

 Computer vision and object detection are increasingly used in the automation of business processes. Along with the dynamic development of technology, especially artificial intelligence, there are many new innovative business applications for this type of algorithms. In one of our recent posts, we outlined how to build a custom R-CNN based detector. In this article, we will walk you through how to do the same with YOLO v5, which has grown in strength in recent years. One of the important aspects over and above other solutions is the speed of inference. As part of this article, we will present the specified use case and all steps of its implementation. Enjoy your reading!

Use case
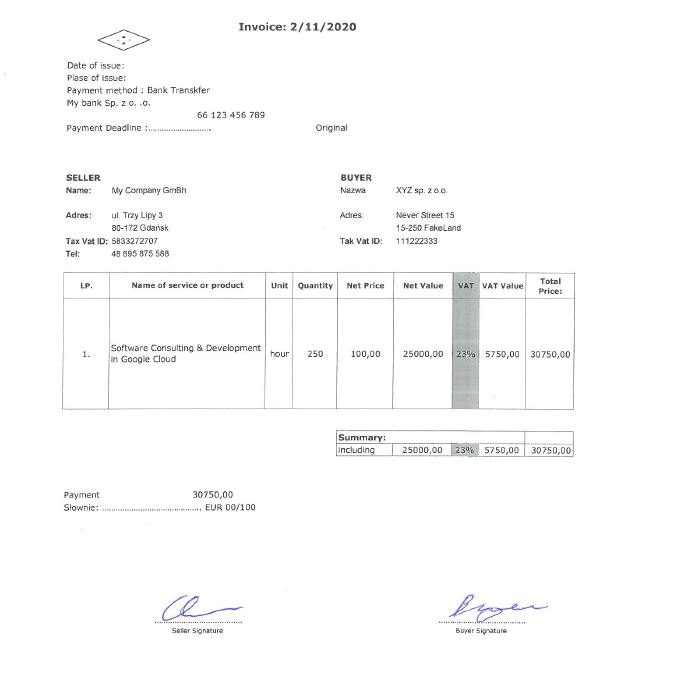
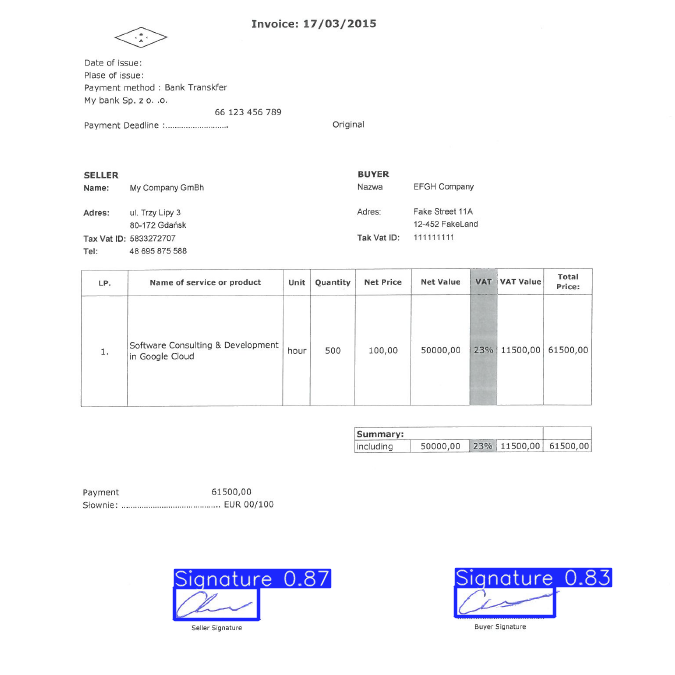
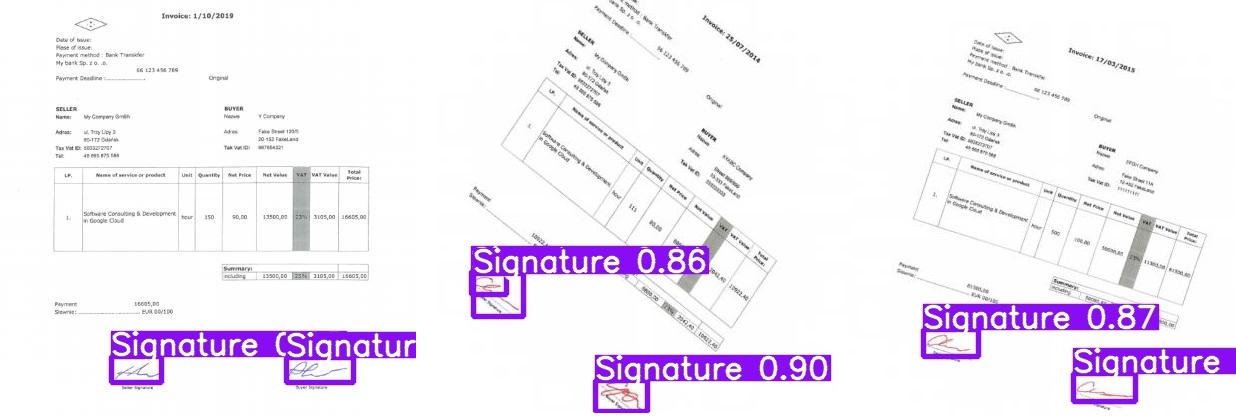
Signatures are still one of the most common methods of document authentication. Especially for enterprise applications, identification of signed and unsigned copies of documents in digital repositories may be time-consuming and a challenging task. However, automation supported by machine learning can make it easier. In this context, we describe the capabilities of YOLO v5 detector, and we will discuss issues of detecting invoice signatures. Let’s start with an example as shown in the figure below. For the purpose of this study, we prepared a fake invoice, fake data of the seller, buyer or the product itself. Let’s investigate now, how we can focus on hand-written signatures (which is fake too :-)).
Collecting Data
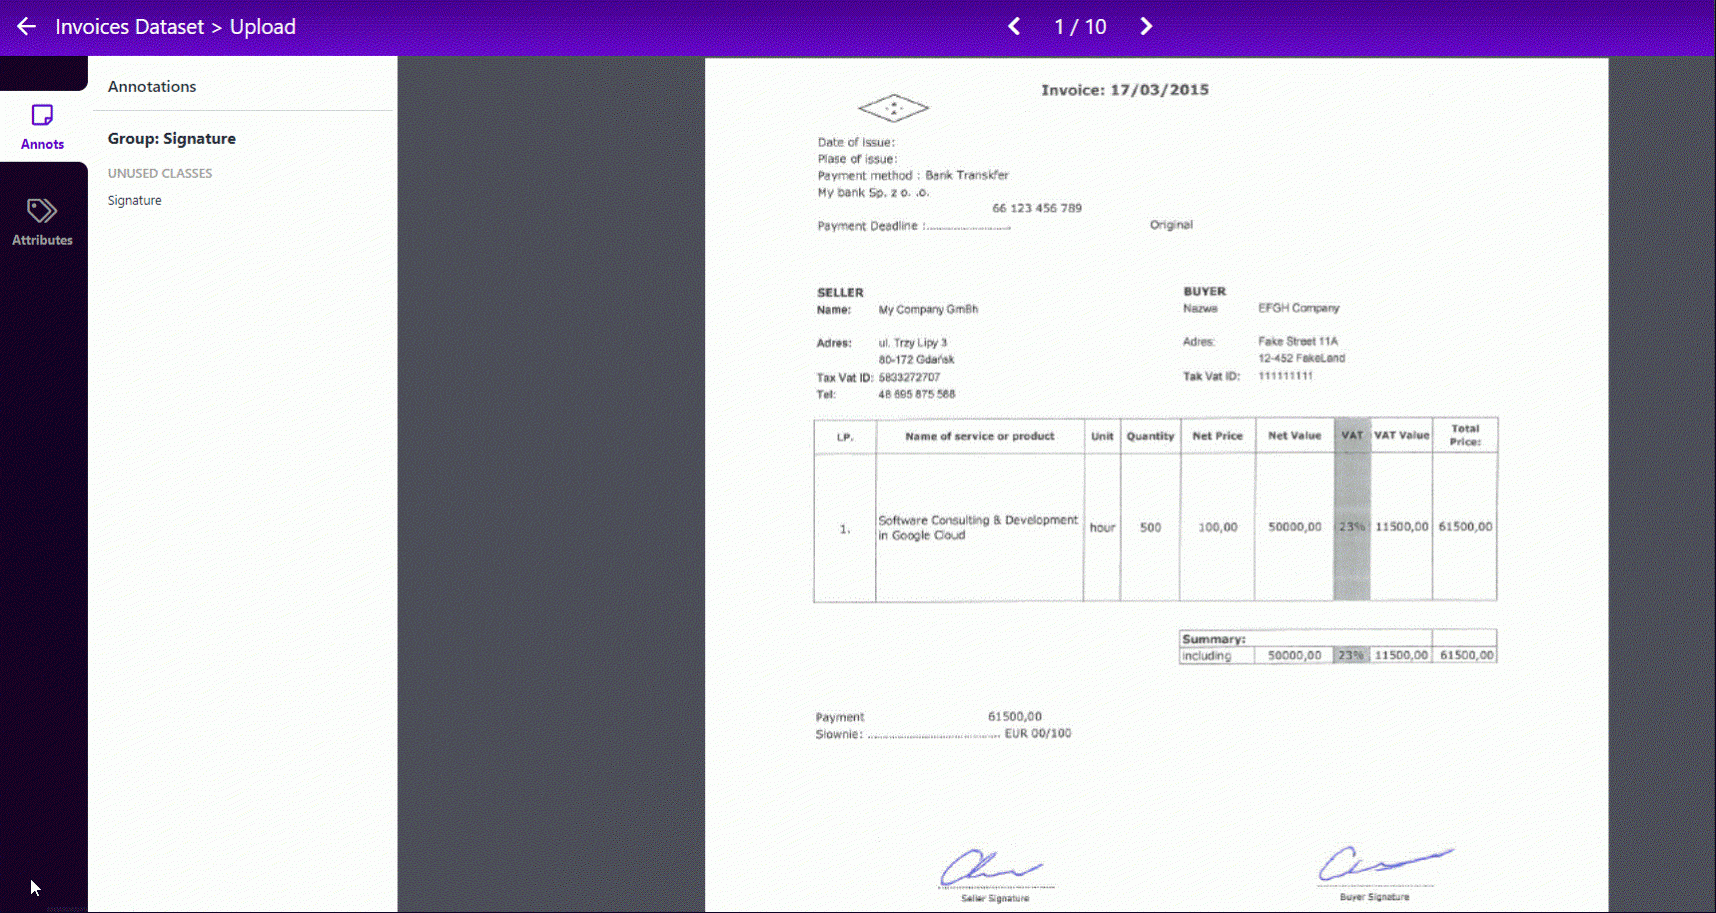
One of the first steps is to collect a set of images to train your model. For our use case, we have prepared a small 10 sample training set of invoices filled with different data and augmented this collection by a dedicated Python script. To make things easier, we used a Roboflow, which is a useful tool for data tagging Here you can upload your dataset and make a quick annotation process like on this GIF.
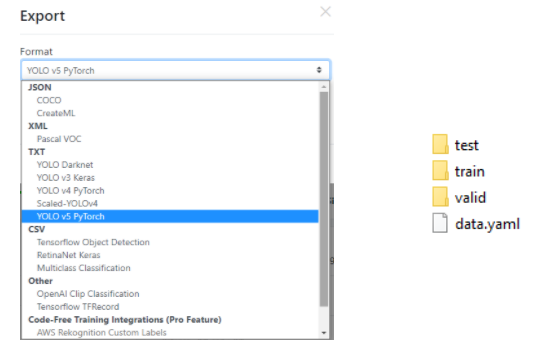
Additionally, we can generate more output images with random values of rotation, saturation, exposure, noise, blur and other types of transformations. Moreover, with the help of this tool, we can determine our training, validation and test data split – the default is 70%, 10%, 10%. This is an important thing to prevent overfitting our model, you can read more about it on this blog. Thanks to the described tool, we can export our dataset in the YOLO v5 Pytorch format and put it in the directory of our project. The figure below shows the selection and target tree, where one of the most important files is the data.yml that will be used for training.
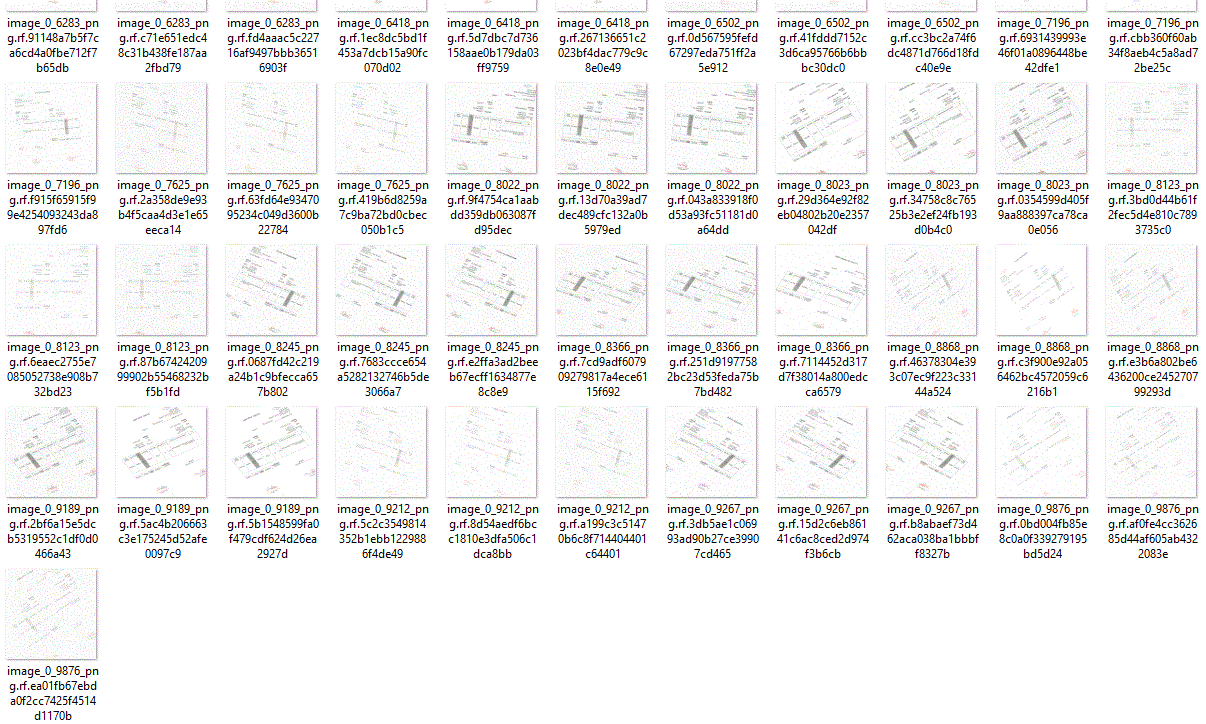
In our case after the first step of augmentation by a Python script, we generate 69 images. Additionally, we use a noise option in Roboflow, which allows us, in the end, export 169 annotated examples. Our images were ultimately split as shown in the figure below.

And here you can see some of the train examples…
Model configuration and architecture
The next step in the whole process is to define the configuration and architecture of the YOLO model. We may build our own network structure, although in version 5 we are provided with one of the following models:
- YOLOv5s,
- YOLOv5m,
- YOLOv5l,
- YOLOv5x.
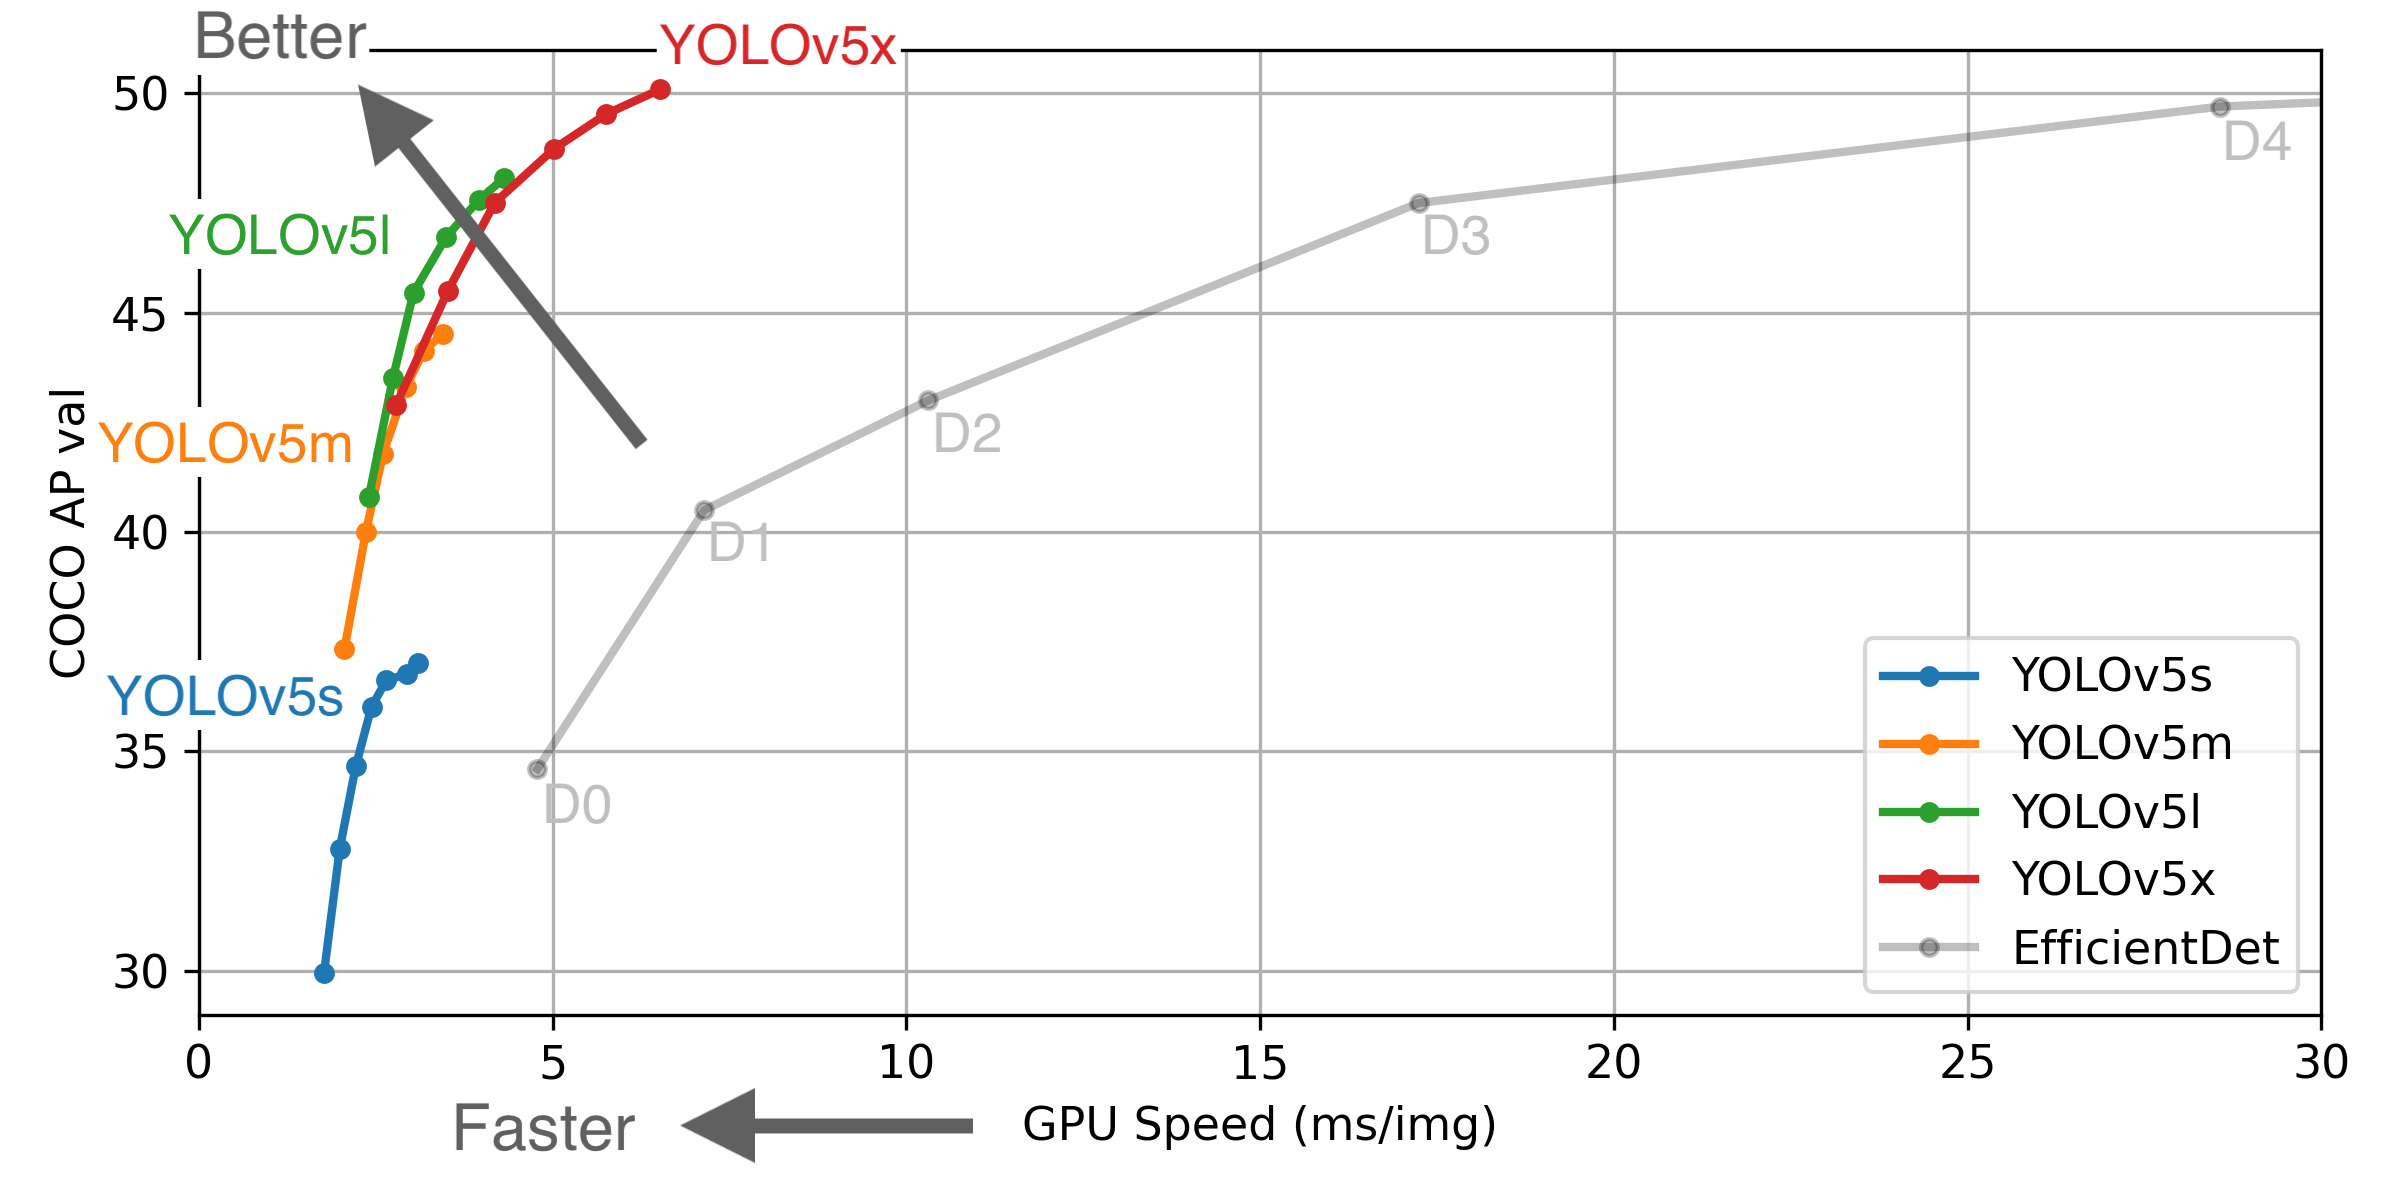
We may use any of them but we must remember to assign appropriate target file parameter value called nc – number of classes. In our use case, it’s 1. The models differ from each other with the number of parameters used, speed of frames per second (FPS), accuracy and others… On the figure below you can see how they cope with the same COCO dataset. Click on the image below to learn more.
Training
What’s important, the Ultralytics company provides us with YOLO v5 developed in PyTorch, a framework specialized in machine learning. Thanks to this, we may download their repository from GitHub and train our own detector. Nothing simpler, but what else do we need for everything to work fine?
To run each of the scripts we must install the dependencies contained in the requirements.txt. If we are using pip, we can use the following command in the terminal. Please remember that you must be in the project directory.
pip install -r requirements.txt
In the installation process, one thing may be a problem. Namely, the PyTorch library…
The different operating system, package in use, programming language etc. may require a specified command. You will find everything you need in this tutorial.
Let’s assume you have passed all the requirements and start our training!
One line of code is enough to run this process, but we need to make sure that we have prepared two important files – data.yaml and for example yolov5l.yaml. The first one you should have from the data collection stage and the second one can be found in the YOLO v5 repository, in the Models directory.
That’s it! Let’s run the training by the following command:
python train.py --data dataset/data.yaml --cfg models/yolov5l.yaml --weights ''
The above command is the simplest possible, additionally, you can define the following options or parameters:
- img-size,
- batch-size,
- epochs,
- name,
- no-save,
- cache…
For the purposes of this article, we conducted a relatively short training for images resized to 416×416, batch size 32 and 1500 epochs. When the process is complete, the result will be a weight file named best.pt.
Perhaps you may stop your learning process if your weights are optimal for you at the moment. We stopped our training after 650 epochs, which took about 15 hours in total. Please note that the PC used does not have a dedicated graphics card.

Detailed metrics of our training:
- precision – 0.93507,
- recall – 0.96429,
- mAP_0.5 – 0.94755,
- mAP_0.5:0.95 – 0.48702,
where:
precision – measures how accurate are your predictions,
recall – measures how good you find all the positives,
mAP_0.5 – mean average precision for IoU* = 0.5,
mAP_0.5:0.95 – mean average precision for IoU* from 0.5 to 0.95 with a step size of 0.005,
* IoU (Intersection over Union) – measures the overlap between 2 boundaries. Find out more about these metrics here.
Inference on test images
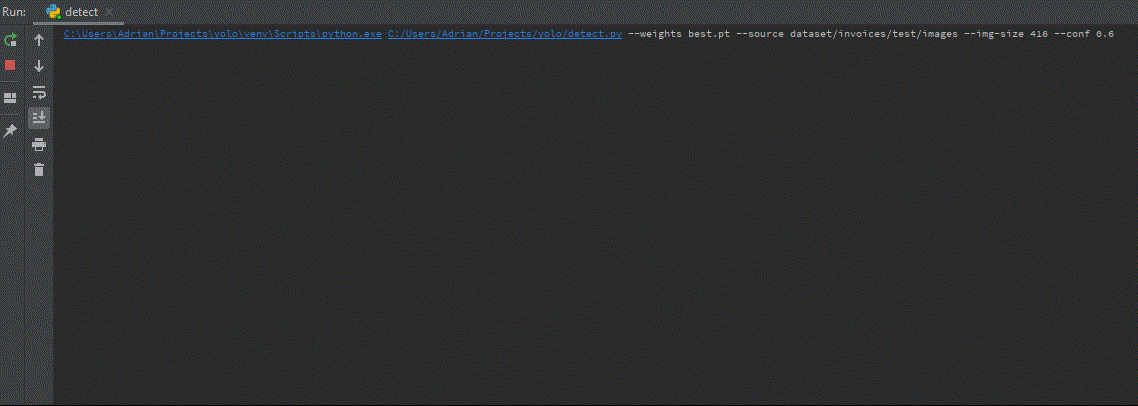
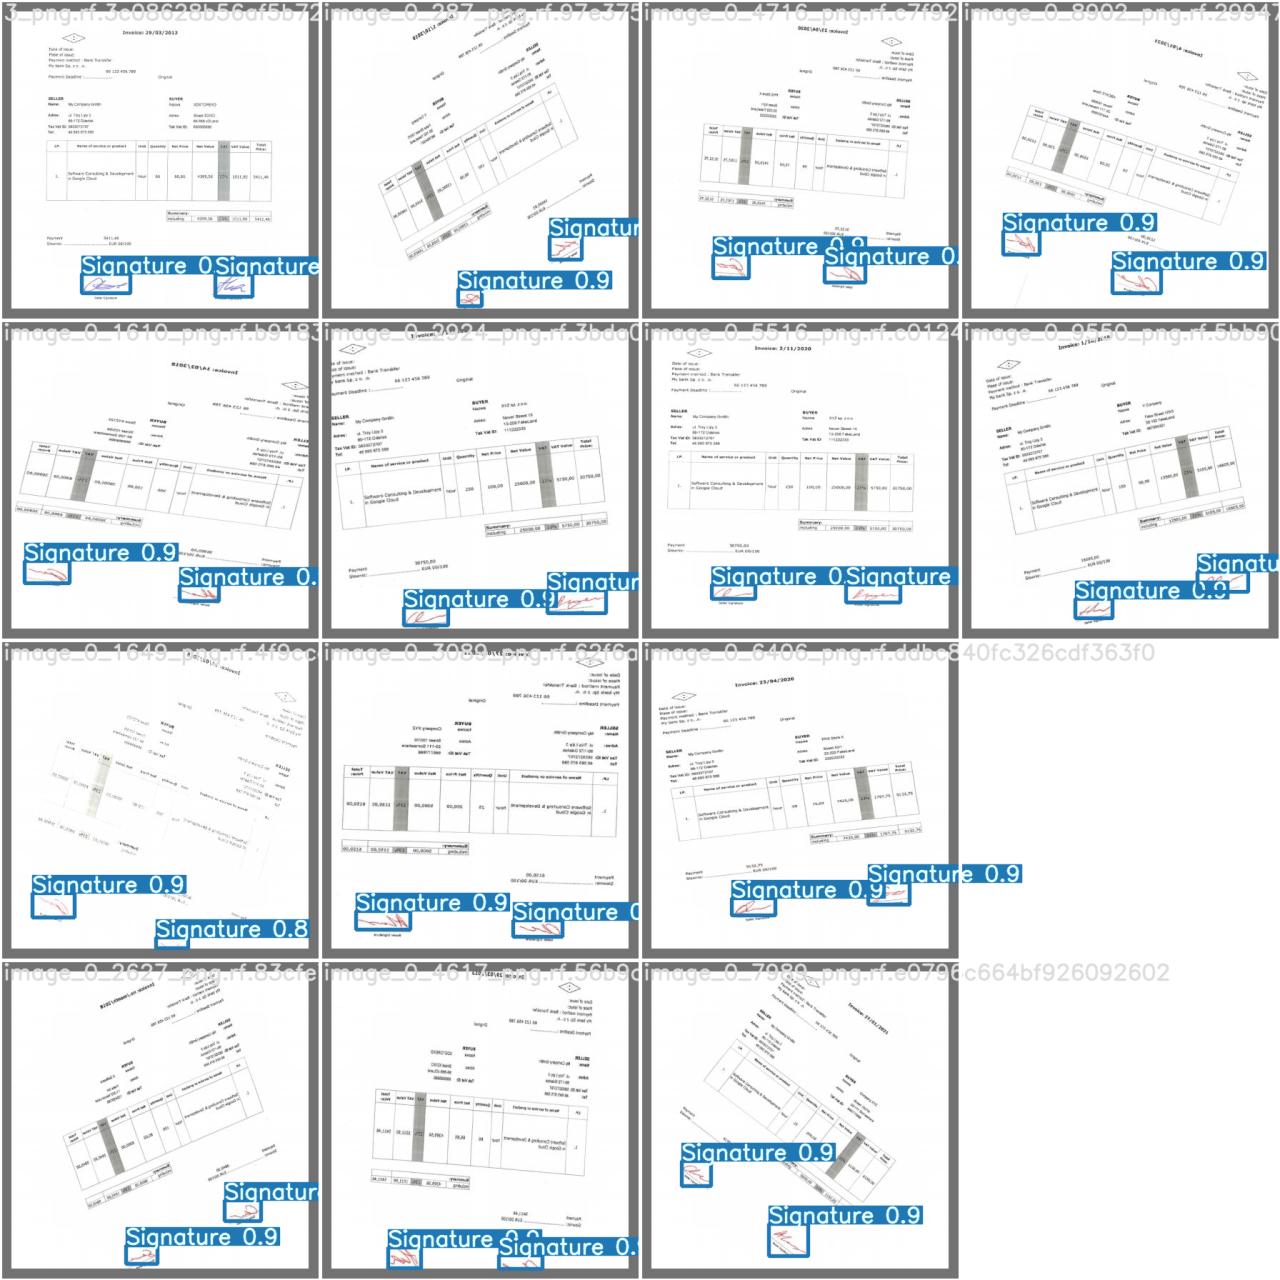
Now, when we have our trained model trained after the learning stage, we may go to inference on test images. As you remember, one of the directories exported from Roboflow was called test. We can use it by putting in the terminal following line:
python detect.py --weights best.pt --source dataset/test --conf 0.6 --img-size 600
where conf is model confidence – higher required makes fewer predictions.
Finally, we may see the result visualization. The approximate inference time on one test image 416×416 was ~ 0.3 s, while for 700×700 ~ 0.8s.
Summary
For the implementation of the described detector, we used only 10 images, extending the dataset by augmentation process. Thanks to the Roboflow tool, it was possible to quickly annotate and export the data to the YOLO format. The learning process allowed us to obtain a target detector that effectively recognizes signatures on invoices.
Please note that with such a small dataset it is only adapted to recognize similar invoices. If we wanted to expand the possibilities of our detector, we would have to equip ourselves with a better graphics card and more, and more data. Additionally, you may be tempted to add a new class, e.g. to separate the objects into the Signature of the Seller and the Buyer.
Maybe you will see a new article in the future with more recognition classes. Stay tuned!
In Inero Software – software development agency, we are experts of digital transformation and smart automation. We provide knowledge and expertise on how to successfully use cutting edge technologies and data to shape corporate digital products of the future.
For more information, visit us on our website or follow us on LinkedIn.