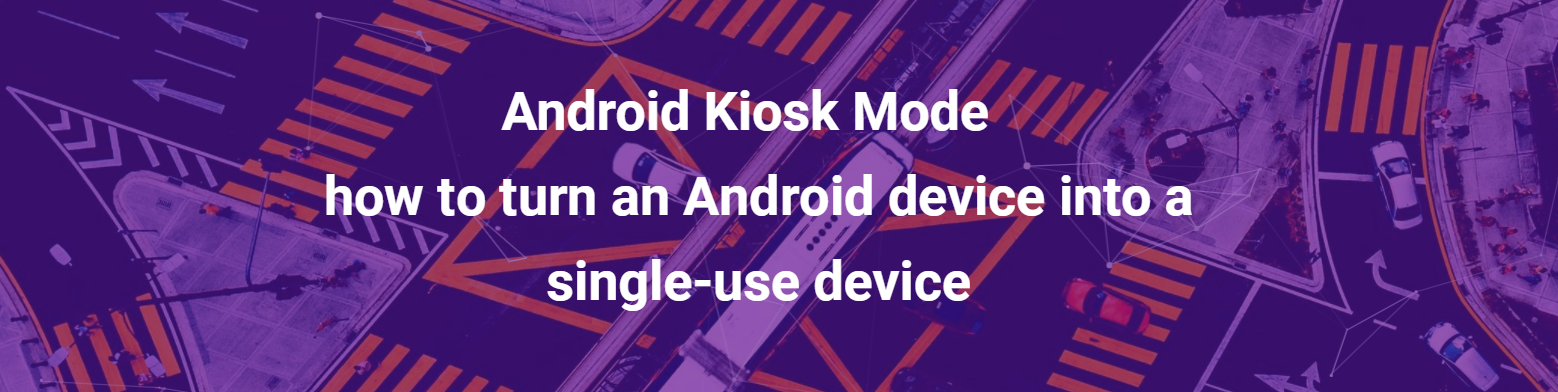


Android Kiosk Mode - how to turn an Android device into a single-use device


I believe that the Android OS needs no introduction. It is currently the most popular smartphone operating system. However, the days when Android was only used in consumer electronics are behind us. Today we can meet Android devices at every step. It is increasingly used in industries such as security, automation, logistics, sales, hospitality, etc. Due to its ease of use, flexibility, level of customization and lower cost, Android devices are the choice of many enterprises and organizations. However, for many companies Android systems are not considered safe enough for use in the workplace or like all mobile devices are too distracting. One of the best solutions to the above problems is the Kiosk Mode tool, which allows us to convert your Android device into a dedicated app, while providing additional security and reducing additional distractions. Enjoy your reading!
COSU – corporate-owned single use device
Dedicated devices (formerly called corporate-owned single-use, or COSU) are fully managed devices that serve a specific purpose. Thanks to this, it is possible to maximize the use of the device, while limiting use of personal and non-supervised functions like telephony, messaging etc. We deal with many such devices every day. These include vending machines, automatic ticket printers, parking meters or interactive information boards in shopping malls. COSU allows IT administrators to remotely control all these devices and can lock the device for a specific application. This prevents users from using other applications or performing other activities on these devices.
Kiosk Mode
Kiosk mode allows to turn Android devices into single-use devices by running only one application or a specific set of applications. Starting with Android 5.0 Lollipop, the system offers two ways to lock the device for a specific purpose:
- App pinning – Using the app pinning feature, users can temporarily pin any installed app on the screen. The navigation buttons (Home and Recent apps) are visible but inactive. The user can exit this mode by holding down the Home and Recent apps buttons simultaneously.
- Lock task mode – This is an even more effective way to switch your Android device into a single-purpose kiosk. Only applications whitelisted by the Device Policy Controller (DPC) may be blocked. The navigation buttons (Home and Recent apps) are hidden. Exiting this mode is done by calling the stopLockTask() method. This mode is available to only device owner devices.
Running the application in Kiosk Mode gives us a number of benefits:
- device acts as a single application platform,
- hidden navigation buttons (Lock task mode),
- inactive status bar,
- automatic app startup with system startup,
- disabled notifications,
- blocked incoming calls,
- inactive transition to settings,
- working in full screen mode.
How to enable Android Kiosk Mode?
The first step is to implement the class inheriting from the DeviceAdminReceiver class:
class MyDeviceAdminReceiver : DeviceAdminReceiver() {
    companion object {
        fun getComponentName(context: Context): ComponentName {
            return ComponentName(context.applicationContext, MyDeviceAdminReceiver::class.java)
        }
    }
}
DeviceAdminReceiver is a class which provides a convenience for interpreting the raw intent actions that are sent by the system.
Then we have to inform the system that our application wants to become the device administrator. We can do this by adding a receiver in the AndroidManifest.xml file:
<application>
          ...
      <receiver
            android:name=".MyDeviceAdminReceiver"
            android:description="@string/app_desc"
            android:label="@string/app_name"
            android:permission="android.permission.BIND_DEVICE_ADMIN">
            <meta-data
                android:name="android.app.device_admin" />
            <intent-filter>
                <action android:name="android.app.action.DEVICE_ADMIN_ENABLED" />
            </intent-filter>
        </receiver>
    </application>
At this point, we can proceed to the installation of the application. Note that, in order to grant administration rights to the app, you must remove all existing users. The easiest way is to apply a factory reset your device. It is important not to add a Google account to the device during the first start-up after the reset. List of steps for correct configuration is as follows:
- factory reset on your mobile device,
- skip the steps related to adding a Google account,
- enable the developer mode and USB debugging on the mobile device,
- install adb (Android Device Bridge) on your computer – it is automatically installed with the Android Studio environment,
- install the application on a mobile device using Android Studio or by entering the following commands in the console:
adb install path / to / kiosk / application.apk
- grant the application device administrator privileges:
adb shell dpm set-device-owner pl.inero.deliverM8 / .MyDeviceAdminReceiver
Use the following code snippet to verify that the granting process was successful:
override fun onCreate(savedInstanceState: Bundle?) {
        super.onCreate(savedInstanceState)
        mDevicePolicyManager = getSystemService(Context.DEVICE_POLICY_SERVICE) as DevicePolicyManager
        val isAdmin = mDevicePolicyManager.isDeviceOwnerApp(packageName)
        if (isAdmin) {
            println("You are an admin")
        } else {
            println("You are not an admin")
        }
    }
Depending on the needs, we can enable the user to disable the Kiosk mode via the interface (e.g. by confirming with a password) or completely block the exit from the application. With the help of the code snippets below, I will try to explain how you can control the device settings to get the solution that best suits your needs.
One of the parameters we can control is whether we keep the device on while the device is plugged in. “0” means to never stay on while plugged in.
private fun enableStayOnWhilePluggedIn(active: Boolean) = if (active) {
        mDevicePolicyManager.setGlobalSetting(mAdminComponentName,
                Settings.Global.STAY_ON_WHILE_PLUGGED_IN,
                (BatteryManager.BATTERY_PLUGGED_AC
                        or BatteryManager.BATTERY_PLUGGED_USB
                        or BatteryManager.BATTERY_PLUGGED_WIRELESS).toString())
    } else {
        mDevicePolicyManager.setGlobalSetting(mAdminComponentName, Settings.Global.STAY_ON_WHILE_PLUGGED_IN, "0")
    }
If we want to impose restrictions on the user, we can use the method addUserRestriction(ComponentName admin, String key). The device user must have device administrator rights or a security exception will be thrown. This method can be called on an instance of DevicePolicyManager.
mDevicePolicyManager = getSystemService (Context.DEVICE_POLICY_SERVICE) as DevicePolicyManagerIn our case, we have blocked the user from factory reset, adding new users, connecting external media, controlling the device volume and turning off the bar status:
private fun setRestrictions(disallow: Boolean) {
        setUserRestriction(UserManager.DISALLOW_FACTORY_RESET, disallow)
        setUserRestriction(UserManager.DISALLOW_ADD_USER, disallow)
        setUserRestriction(UserManager.DISALLOW_MOUNT_PHYSICAL_MEDIA, disallow)
        setUserRestriction(UserManager.DISALLOW_ADJUST_VOLUME, disallow)
        mDevicePolicyManager.setStatusBarDisabled(mAdminComponentName, disallow)
    }
private fun setUserRestriction(restriction: String, disallow: Boolean) = if (disallow) {
        mDevicePolicyManager.addUserRestriction(mAdminComponentName, restriction)
    } else {
        mDevicePolicyManager.clearUserRestriction(mAdminComponentName, restriction)
    }
If we want our application to start with the system startup, then we have to add the appropriate filters:
private fun setAsHomeApp(enable: Boolean) {
        if (enable) {
            val intentFilter = IntentFilter(Intent.ACTION_MAIN).apply {
                addCategory(Intent.CATEGORY_HOME)
                addCategory(Intent.CATEGORY_DEFAULT)
            }
            mDevicePolicyManager.addPersistentPreferredActivity(
                    mAdminComponentName, intentFilter, ComponentName(packageName, MainActivity::class.java.name))
        } else {
            mDevicePolicyManager.clearPackagePersistentPreferredActivities(
                    mAdminComponentName, packageName)
        }
    }
In order to run the application in full screen screen Kiosk Mode , the appropriate flags must be added:
private fun setImmersiveMode(enable: Boolean) {
        if (enable) {
            val flags = (View.SYSTEM_UI_FLAG_LAYOUT_STABLE
                    or View.SYSTEM_UI_FLAG_LAYOUT_HIDE_NAVIGATION
                    or View.SYSTEM_UI_FLAG_LAYOUT_FULLSCREEN
                    or View.SYSTEM_UI_FLAG_HIDE_NAVIGATION
                    or View.SYSTEM_UI_FLAG_FULLSCREEN
                    or View.SYSTEM_UI_FLAG_IMMERSIVE_STICKY
                    )
            window.decorView.systemUiVisibility = flags
            window.decorView.setOnSystemUiVisibilityChangeListener {
                window.decorView.systemUiVisibility = flags;
            }
        } else {
            val flags = (View.SYSTEM_UI_FLAG_LAYOUT_STABLE
                    or View.SYSTEM_UI_FLAG_LAYOUT_HIDE_NAVIGATION
                    or View.SYSTEM_UI_FLAG_LAYOUT_FULLSCREEN)
            window.decorView.systemUiVisibility = flags
        }
    }
Finally, we use the startLockTask () and stopLockTask () methods to turn Lock task mode on / off:
private fun setLockTask(start: Boolean, isAdmin: Boolean) {
        if (isAdmin) {
            mDevicePolicyManager.setLockTaskPackages(
                    mAdminComponentName, if (start) arrayOf(packageName) else arrayOf())
        }
        if (start) {
            startLockTask()
        } else {
            stopLockTask()
        }
    }
Results
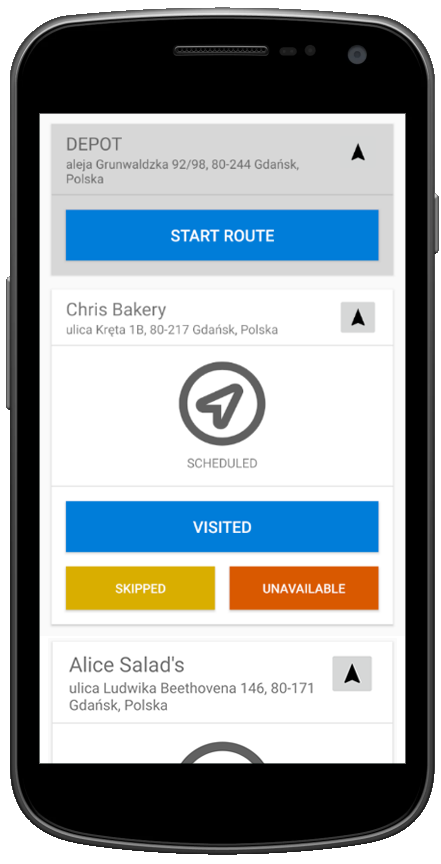
The above operations allow to change the Android device into a dedicated device, operating in full screen mode and preventing the user from using other functionalities. For the purpose of exemplification of our case, we used a mobile application, developed in our company for supply chain management. This application is a part of DeliverM8 platform, we developed in order to optimize and plan supply chain management tasks for the last mile delivery. You can read more about it here. Coming back to the topic of the blogpost, the final effect is as follows:
Summary
In this blog post we showed how to quickly set up a configuration of a mobile application to get a single purpose device that meets our needs as much as possible. The use of the Kiosk Mode brings many benefits, such as increasing security or limiting access to undesirable functionalities, creating a solution tailored both to the needs of employees (inventory management, field service management, transport and logistics) and customers (hospitality check-in, self-service kiosks).